

Setting Up Your Community Domain
Step 1: Setting up your Communities Domain
Please Note:
If you have already configured a domain for your ClientPortal, you will not need to do so again for your Communities portal as Communities uses the same domain as the Client Portal.
To configure your domain for communities, follow these steps:
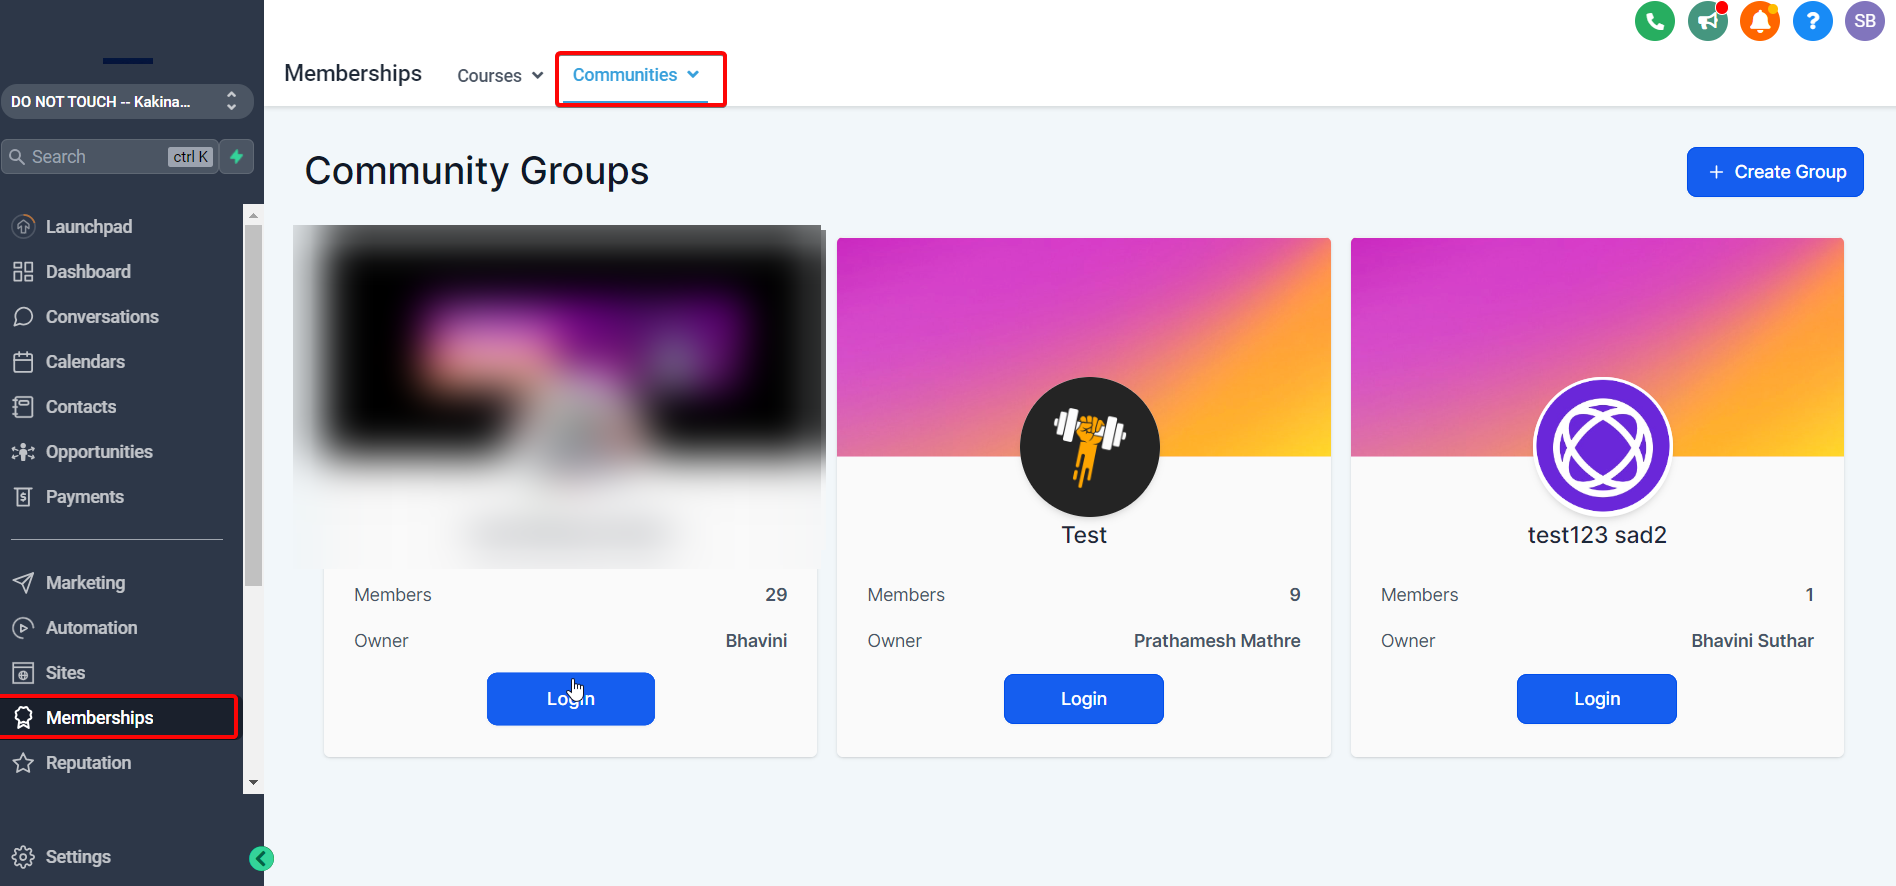
Start by accessing the "Communities" section within the Memberships area in the sidebar.
Head to Settings
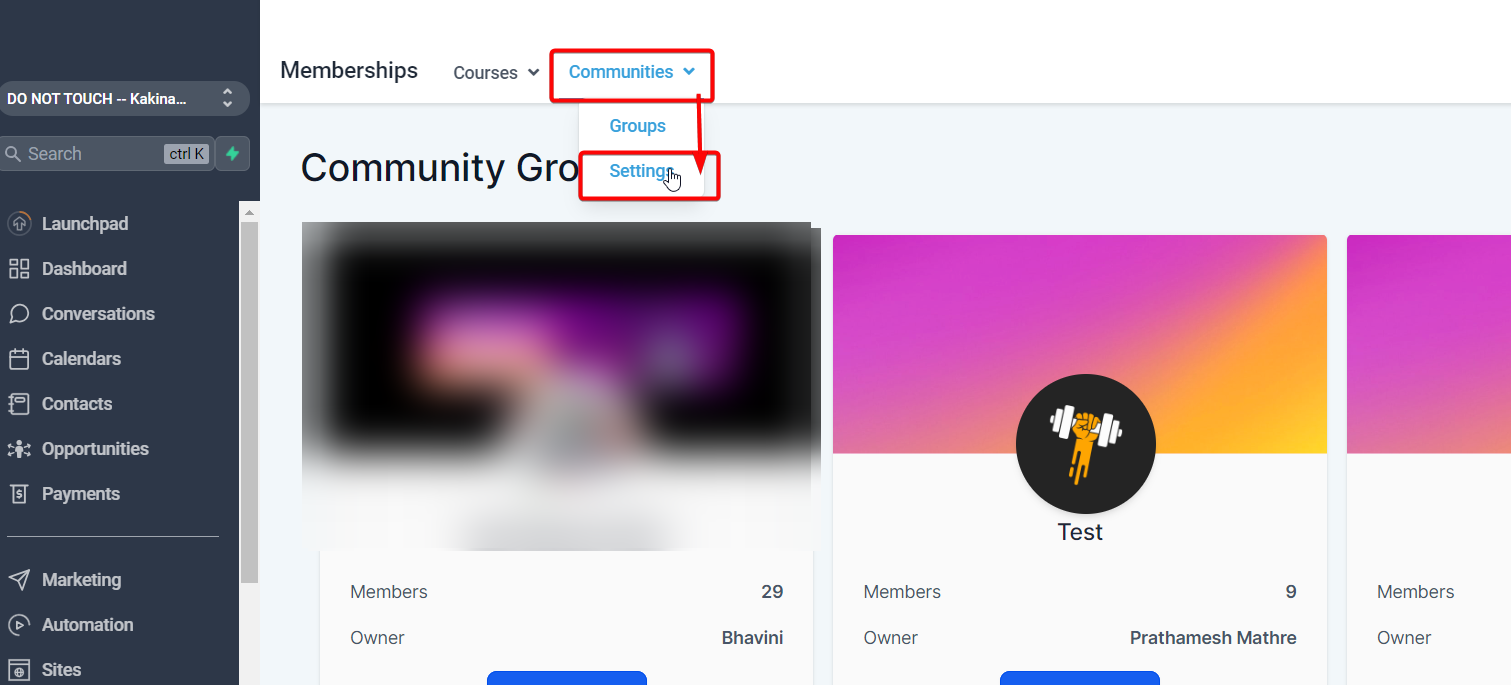
It will automatically navigate you toClient Portal's Domain Settings, as both features use the same domain.
Please Note:
At this point, you have two options available to you: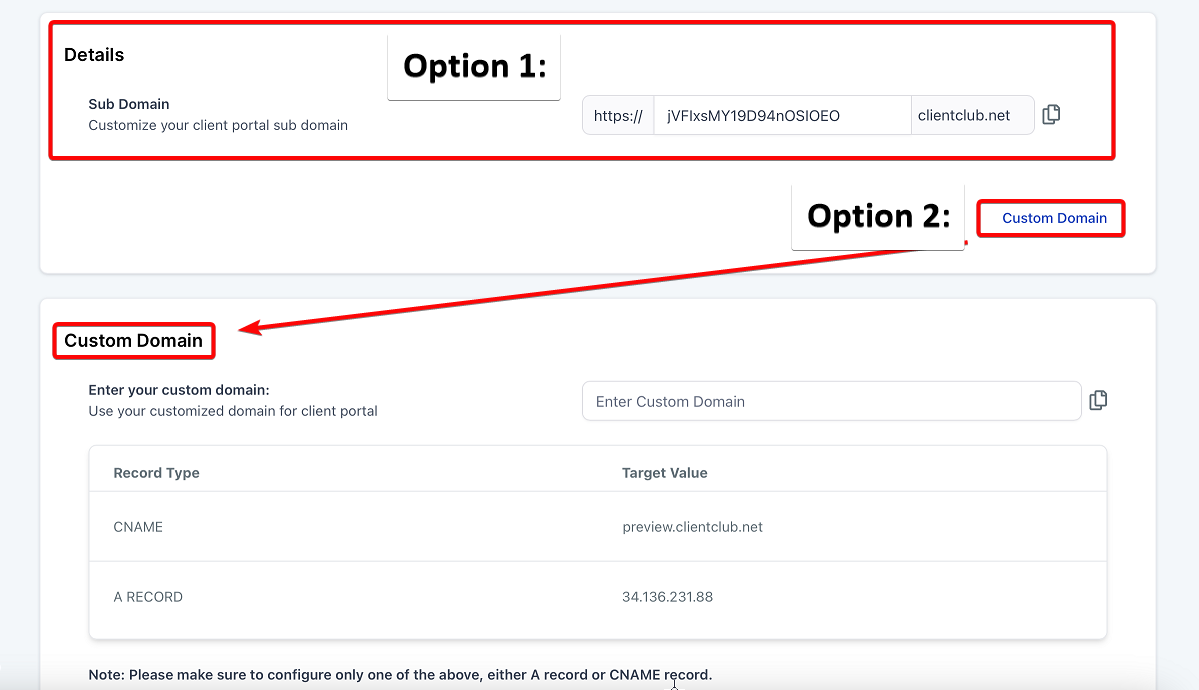
Option 1: Utilize a pre-configured subdomain under "clientclub.net". This subdomain is already set up and ready to be used immediately. Simply select this option if it suits your needs. You will still need to scroll down and hit Update Domain to get this to work.
Option 2: Set up your own custom domain. If you prefer to use a domain that you own, follow the next steps.
To configure a custom domain for your client portal, follow these steps:
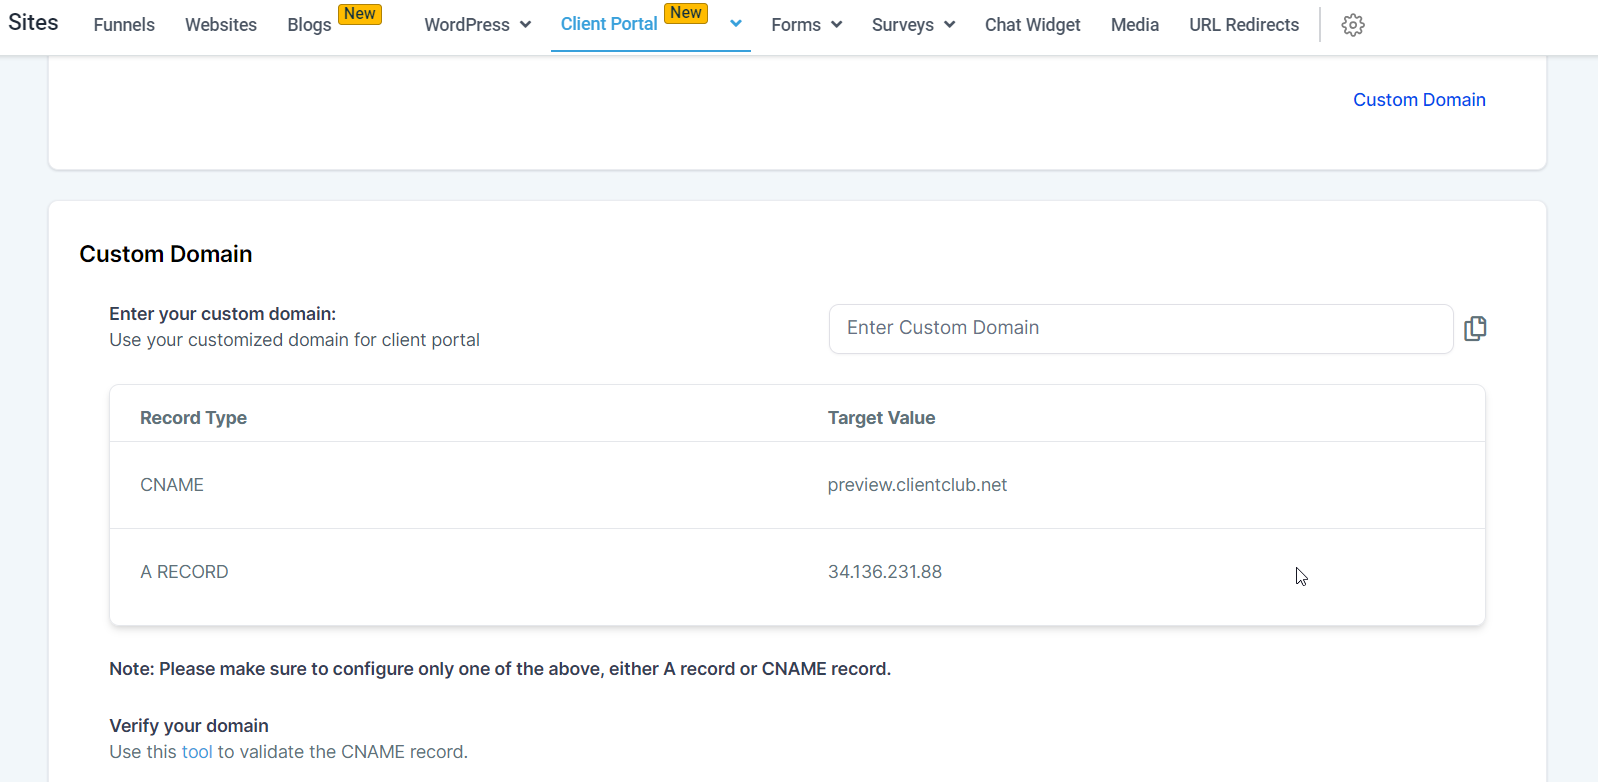
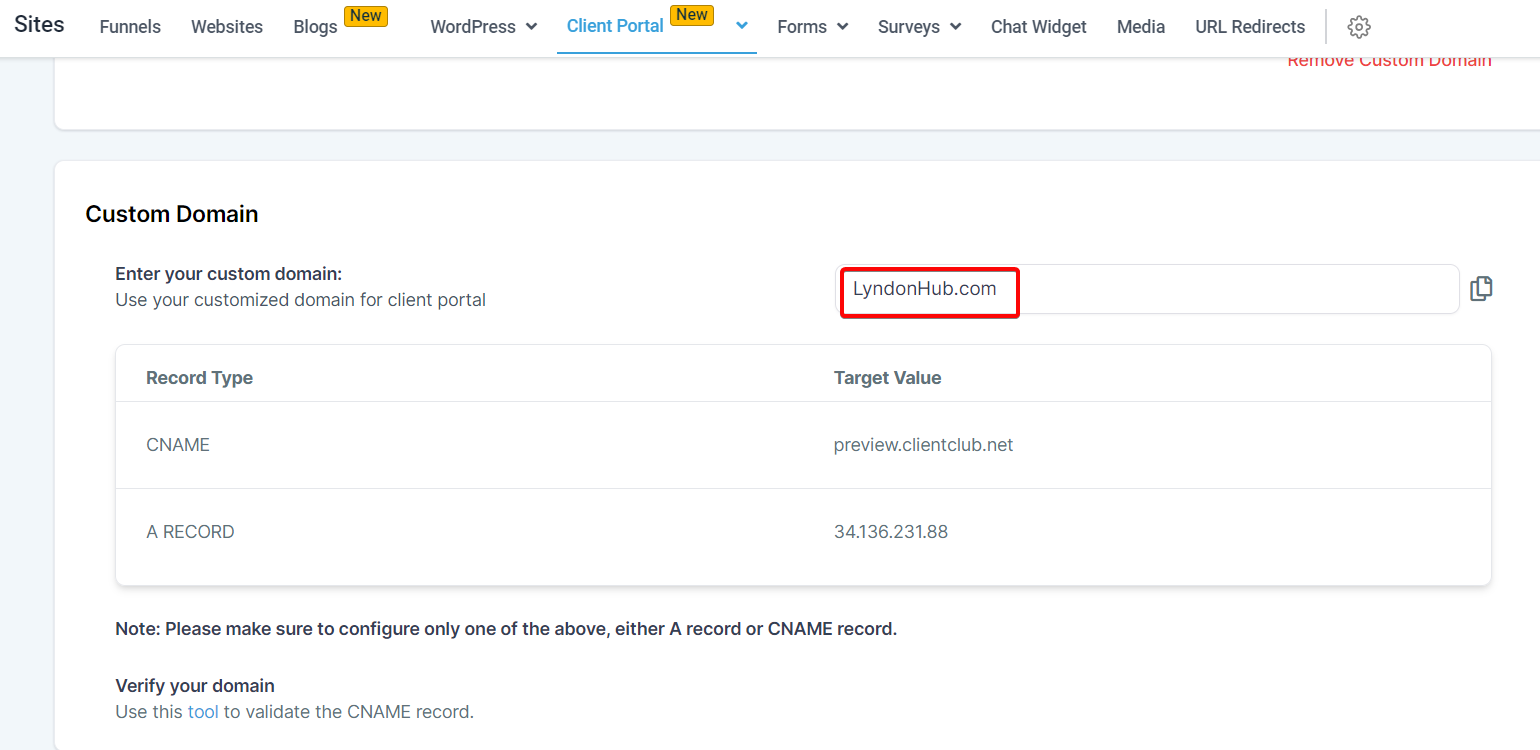
Using the left sidebar, navigate to the Sites tab then the Client Portal section. Proceed to the "Domain Setup." area.

Click on the option for a Custom domain and input your desired domain name.

Before you can successfully set up an A or CNAME record, you must ensure that you have already configured your domain registrar to point to the specific IP address or server provided to you. This is an essential step in ensuring that your domain correctly refers to your server, enabling it to function properly.
A Record, also known as an Address Record, maps your domain to an individual server IP address. On the other hand, a CNAME record, or Canonical Name record, is used to map your domain (or subdomain) to another domain name.
Here's a step-by-step guide on how to add A records and CNAME records:
Login to your Domain Registrar's dashboard.
Navigate to the DNS settings.
Here, you will find an option to add a new record.
Select the type of record you want to add (A or CNAME).
Enter the details - for an A record, this would be the IP address 34.136.231.88
; for a CNAME record, this would be the target domain preview.clientclub.net
Save your changes.
Different registrars might have slight variations in the procedure, so here are some specific guides for popular registrars:
Please note:
It's important to replace the "designated IP address or server" placeholder with your actual IP address or server information in the record. Make sure to fill out this field accurately, as it's essential to correctly configure your domain settings.Once you have entered the DNS records in your Domain registrar, give it a reasonable time to propagate them (depending on your domain registrar), and hit Update Domain.

Please note:
While the following resources provide a good general overview, the exact time of DNS propagation can vary due to several factors, such as the TTL set for the DNS record, your ISP's update frequency, and geographical factors. Typically, it is suggested to allow between 24 to 48 hours for DNS propagation.

Siteground: "Understand DNS Propagation & Why it Takes so Long"
GoDaddy: "What factors affect DNS propagation time? | Domains"
HostGator: "Propagation Times | HostGator Support"
DomainKing.NG: "DNS Propagation – how long does it take?"
AccuWeb Hosting: "How long Nameservers propagation could take after ..."
Namecheap: "DNS Propagation – Explained - Domains"
Webcentral: "What is the standard DNS propagation period?"