
How To Create A Travel Related Community Site
Group Creation: Users can create multiple groups based on specific interests, topics, or industries, including the option to soft delete and restore groups for better control. These groups serve as sub-communities where members can engage in focused discussions, share insights, and collaborate on projects.
Domain Setup: The platform allows users to set up their custom domain or use a pre-configured subdomain, providing a personalized experience for community members.
Community Customization:Users can customize their communities, including group name, description, URL, branding (colors, logos, cover images), promotional links, and the ability to toggle the visibility of phone numbers and email addresses under the Social Media section. This allows users to create a unique and branded experience for their community members.
Group Management: The person who creates a group becomes the owner and assumes administrative responsibilities and privileges. This feature offers different roles for group management, including admins, moderators, and members, each with its permissions and responsibilities. Enhanced filtering options enable users to sort by user status and roles, and security measures are in place to protect email visibility.
Membership Management: Potential members can join a group by creating a community profile and signing up via the group's unique URL. Once they sign up, they can participate in any available community groups. Additional features include easy search for members and direct access to profiles from the View Members page.
Learning and Networking Opportunities: The communities provide a platform for users to learn from various courses, participate in discussions and events, vote in polls, and connect with like-minded individuals.
Setting up Community
After setting up your domain, you will have the ability to create groups within a community. Please note that the domain setup process is separate from creating community groups. Now, with enhanced features, you can create, delete, and restore groups, allowing for more robust management.
In communities, groups refer to specific spaces or subdomains where members can connect.
Each subaccount can create multiple groups, allowing for more focused discussions and collaboration within specific areas of interest.
To initiate the creation of a group, access the "Communities" section of the platform. Head to "Groups".
Locate and click the "Create Group" option.
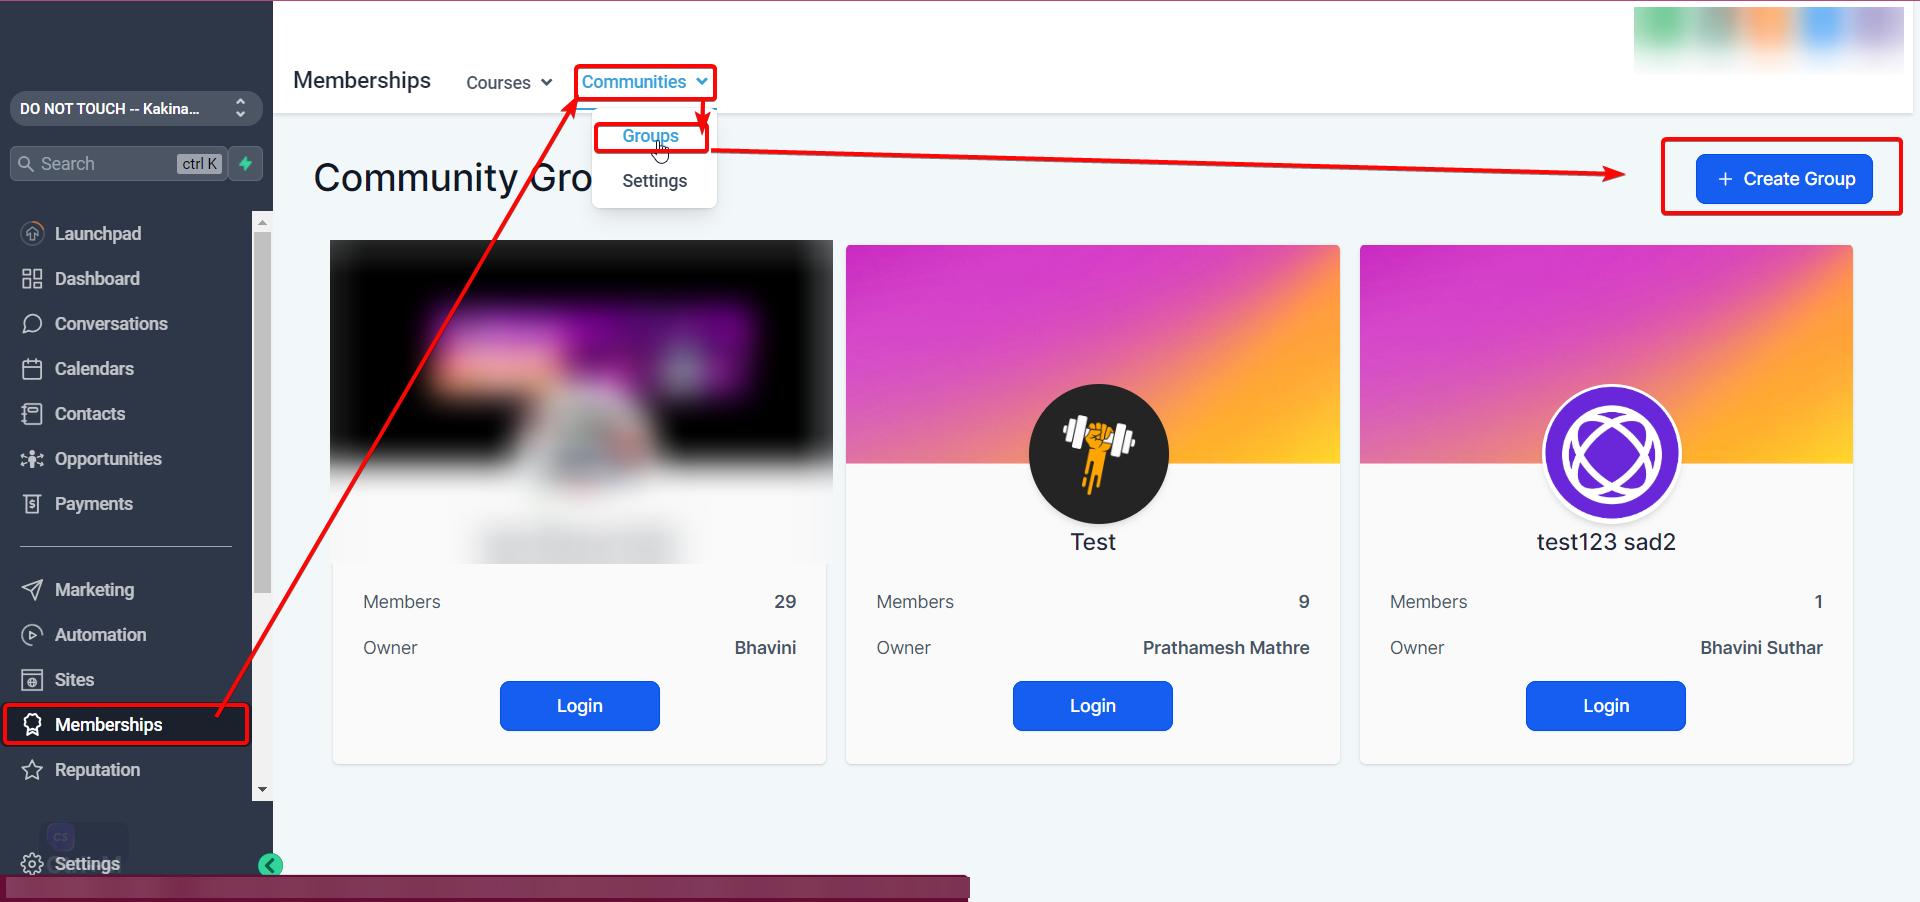
Here, you will be presented with a form or settings page to fill in the necessary details for your group.


Group Name: This field is where you provide a unique name for your group, which will serve as the main identifier for your community. This should be related to the group's purpose or topic. For example, if you're creating a group about digital marketing, you might name it "Digital Marketing Enthusiasts."
Group URL (Group Slug): This is the unique web address where your group will be located. It should be easy to remember and share. Typically, it might be a simplified or abbreviated version of your group name, such as "digital-marketing," if your group name is "Digital Marketing Enthusiasts."
Group Description: This section should briefly outline what your group is about, the kind of discussions that will take place, and what members can expect from being a part of the group. For instance, you might describe the Digital Marketing Enthusiasts group as "A community for digital marketing professionals and enthusiasts to share strategies, tools, and trends in the industry."
Brand Color: Choose a color that represents your group or your brand. This color will be used in your group's design to provide a consistent look and feel.
Favicon: This small icon will appear in the browser tab when someone is viewing your group. Ideally, It should be a small version of your logo or a symbol representing your group.
Cover Image: The main image will appear at the top of your group's page. It should be visually appealing and relevant to your group's topic. The recommended aspect ratio is 16:9, and the image should be clear at a resolution of 200x200 pixels.
Logo: This is the main logo for your group, which will appear in various places, such as the group switcher. It should ideally be square, with a 1:1 aspect ratio, and clear at a resolution of 200x200 pixels.
Once you have filled in the required details, create the group using the provided options or buttons.

Please Note:
The individual who initiates the group creation process automatically becomes the owner of that group, assuming administrative responsibilities and privileges within the group.Customizing your Groups
You can personalize and customize your community groups to align with your brand and community objectives. The initial customization you performed in Step 2 sets the default for your group, but additional options are available to refine your group's appearance and functionality further. Here's a comprehensive guide:
Details:
Group Name and Description:
You can choose a suitable name for your group that aligns with its purpose.
Add a descriptive group description to provide information and context to potential members.

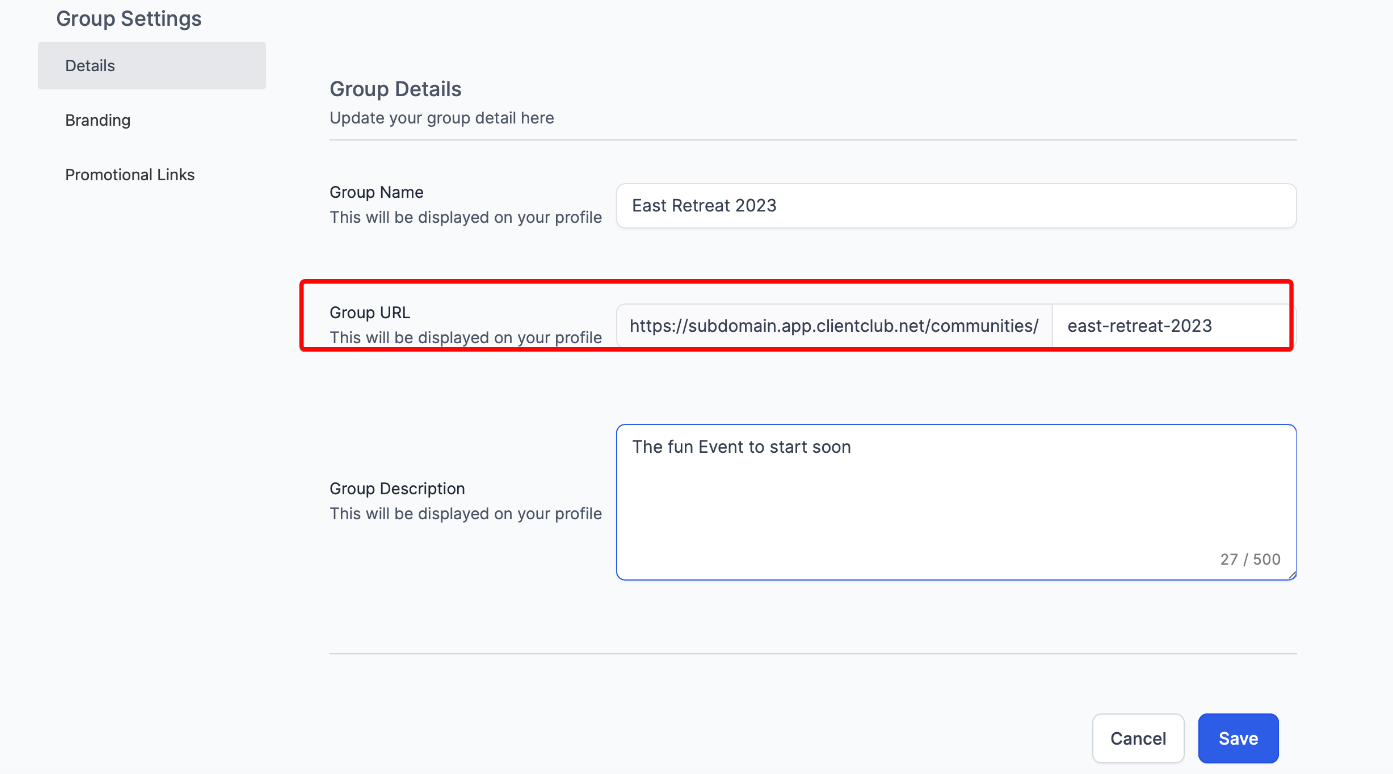
Group URL:
Customize the group's URL to make it more relevant or memorable for your audience.
Each Community Group is initially assigned a default URL, but you can personalize it according to your preferences.
Please Note:
You can only modify the group URL once, so it's crucial to double-check your desired URL before saving the changes.Access the group settings by clicking on the settings icon at the top of the page.
In the left menu, locate and click on the "Details" section.
You will find the option to change the group URL within the Details section.
Once you have made the necessary adjustments, save the changes.
Congratulations! Your group now has a customized URL. To confirm the update, you can revisit the settings modal and ensure that your current URL reflects the newly set one.
By following these steps, you can customize your Community group's URL. Please review your changes before finalizing them, as there is a one-time limitation on modifying the group URL.
Branding:
Primary Color: Choose a color that mirrors your brand, providing consistency throughout the group.
Group Logo: Upload a logo that will appear in the group switcher for easy identification.
Cover Image: Add a visually appealing image that resonates with your group's theme or branding.
Favicon: Include a small icon for browser tabs, reinforcing your group's visual identity.
Select a primary color that represents your brand identity. This color will be reflected throughout your group, creating a cohesive visual experience.
Upload a group logo in the group switcher, allowing members to identify and navigate to your group easily.
Add a cover image to personalize the group's appearance and showcase relevant visuals or branding elements.
Include a favicon, a small icon displayed in the browser tab, to further enhance your group's branding.

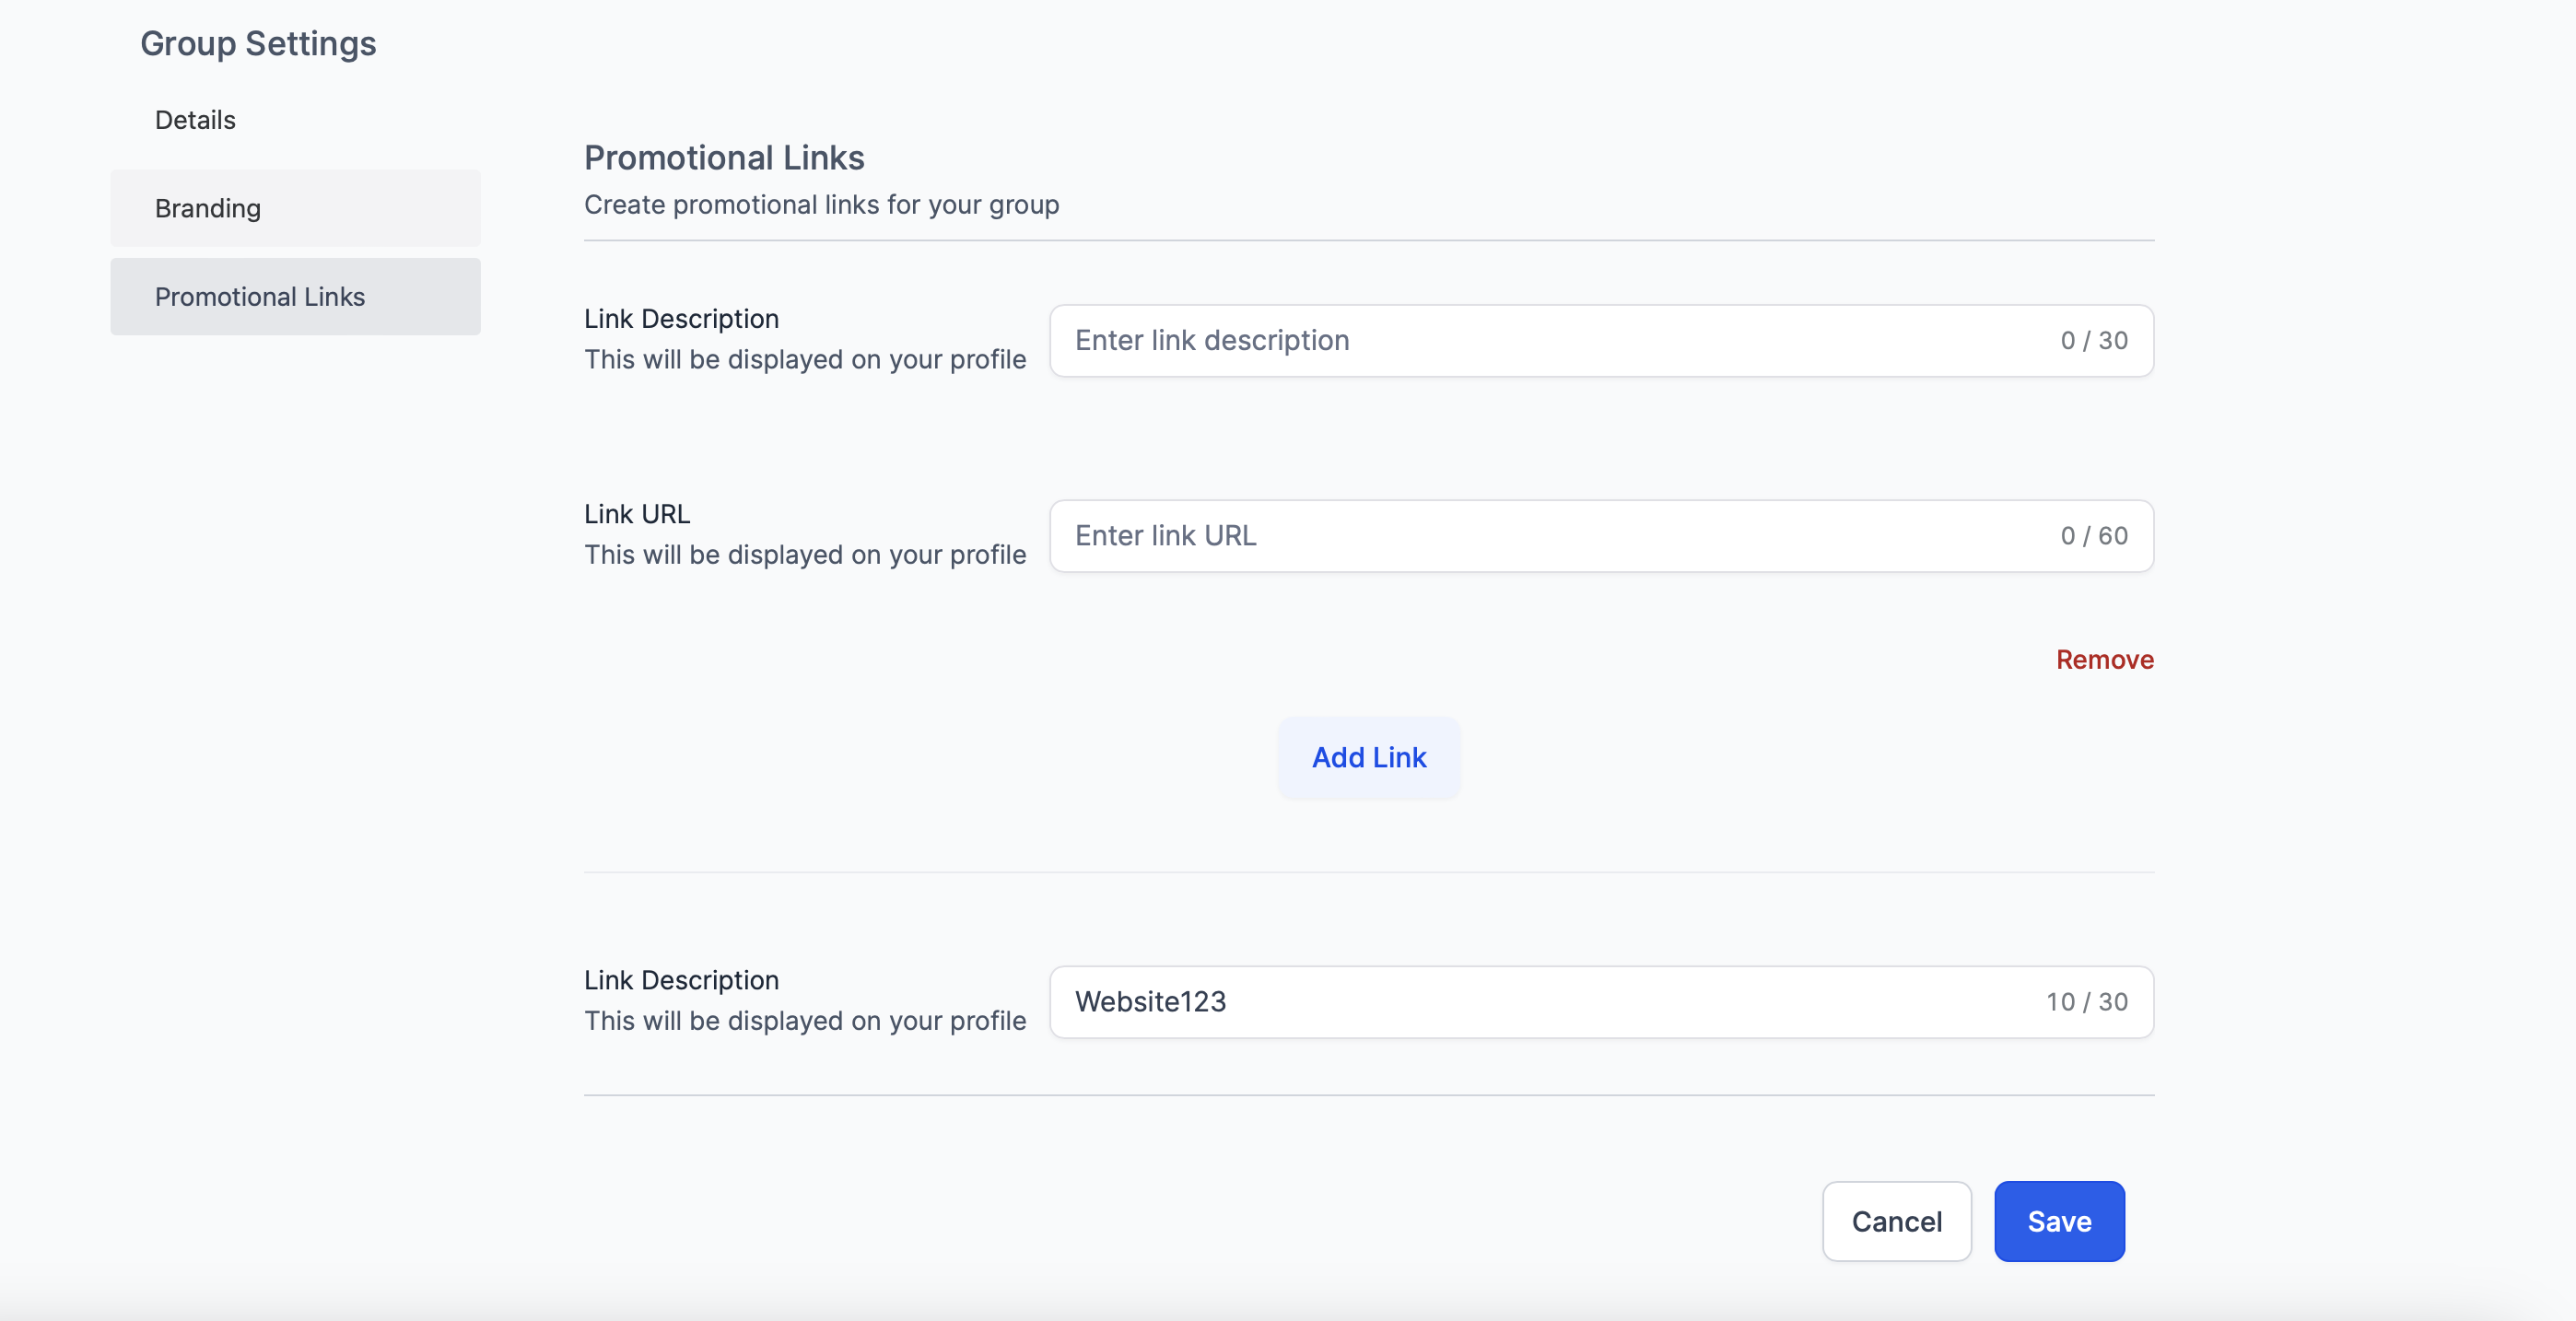
Promotional Links:
Integration: Incorporate promotional links within your group, adding a title and corresponding URL.
Visibility: These links can be seen by your community members, facilitating the sharing of relevant resources or announcements.
By leveraging these customization options, you can tailor your community group to create a unique and branded experience for your members.
Activate or Deactivate your groups:
You can delete and restore groups easily, giving you better control over group management.
Head over to Memberships> Communities> Status tab for your desired group:
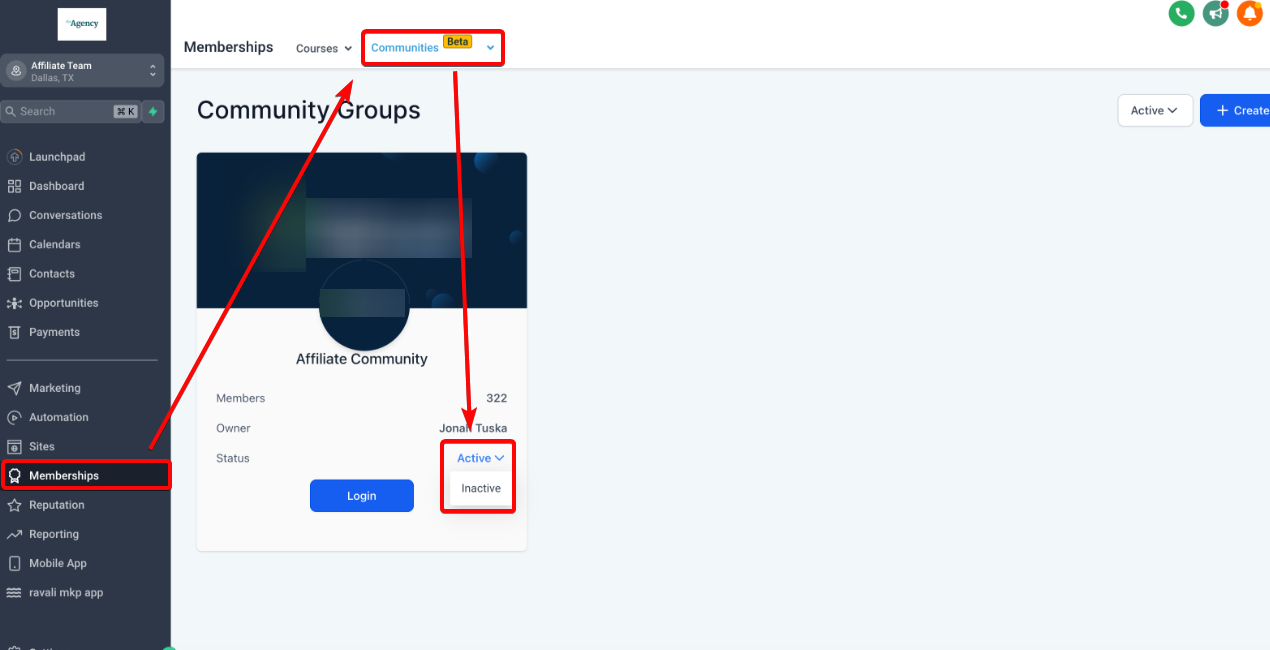
You can switch it toActive to activate your group orInactiveto Deactivate your group.
You can filter your list of visible groups by whether they are Active or Inactive by clicking on this filter:

Resources: